
Your first workflow
Follow one example from a browser demonstration to a saved procedure, a launch input, and a verified result.
What you will build
This walkthrough creates Explore a guide: a workflow that opens the RamAIn documentation, finds a guide, verifies its page title and URL, and returns its first three section headings. You will first teach a fixed example, then make the guide name reusable.
Sign in to RamAIn and select the workspace where you intend to build. You need workflow-building permissions and an available browser runtime. The screenshots follow a documentation example; your workspace's connected accounts and permissions determine the controls you can use.
1. Start a new browser demonstration
Open Workflows and select New Workflow. Wait for the browser session to become ready, launching it if prompted. Rename the draft Explore a guide using the title field at the top.
The large panel is the browser the agent controls. The right rail is Builder chat: it shows your instructions, the agent's progress, questions, and responses. You are teaching the procedure at this stage; you have not yet tested a saved workflow.
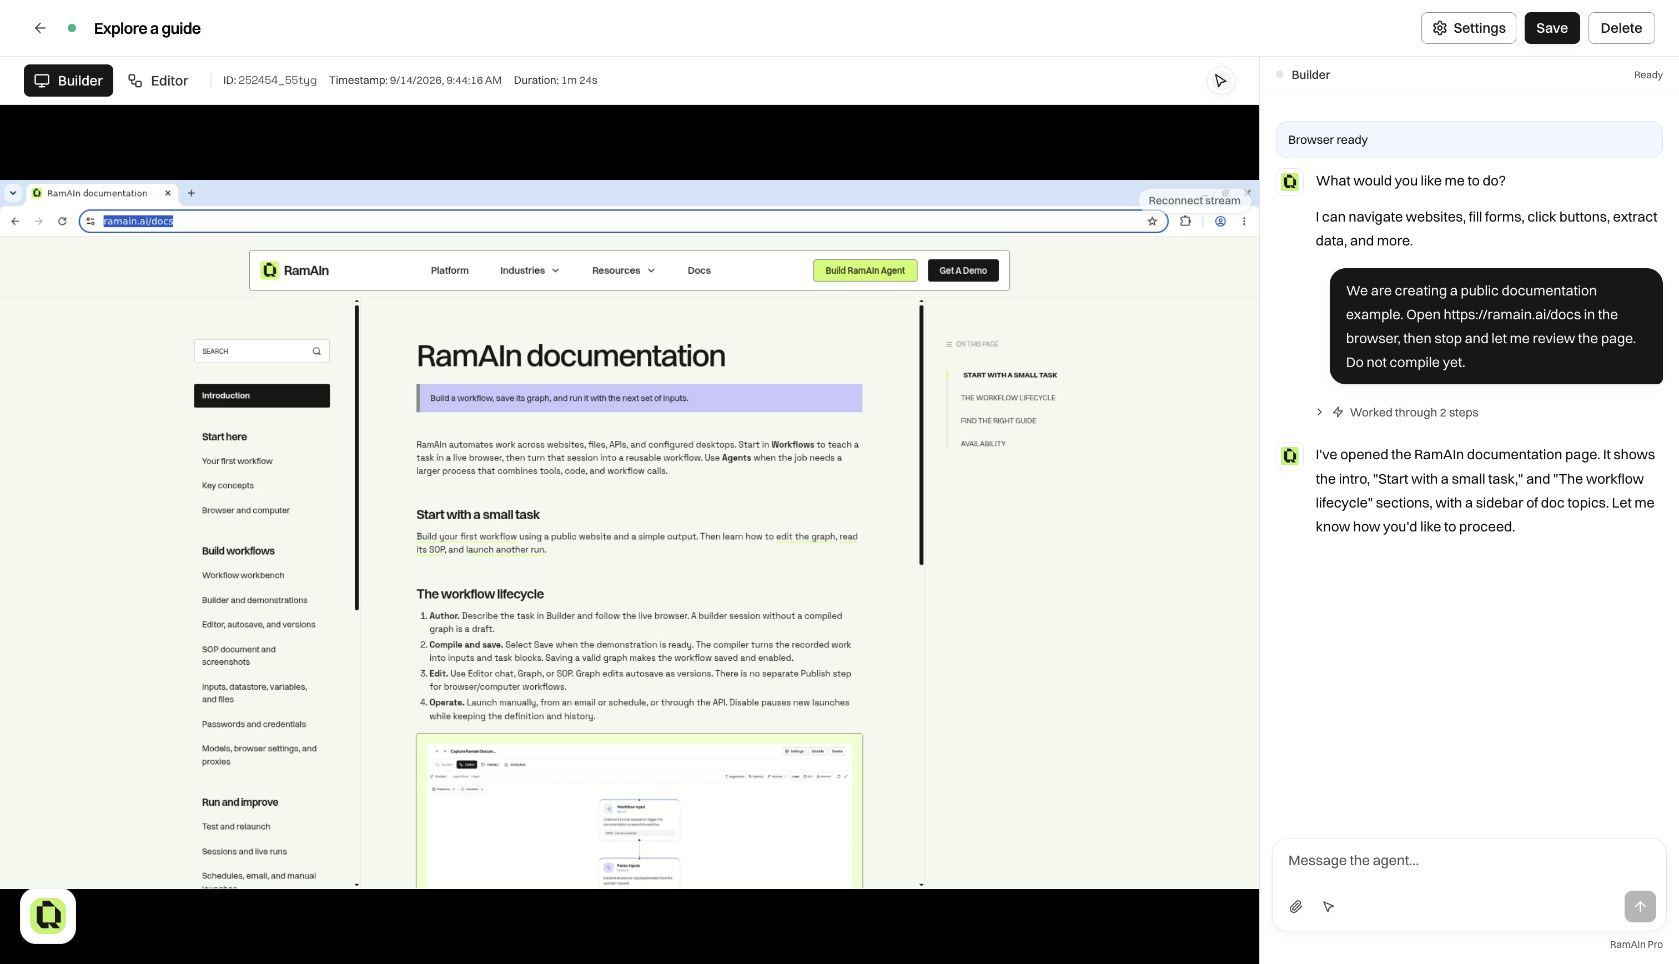
Send:
Open https://ramain.ai/docs. Stop when the documentation page is visible so I can review it. Do not compile yet.
When it finishes, check the visible page. Then send:
Open “SOP document and screenshots” from the docs sidebar. Verify the page title and URL, report the first three section headings, and take a screenshot for evidence. Do not compile yet.
Compare the response with the page. If it opened another guide, correct it in chat and wait for the right page. The Builder guide explains task briefs, direct demonstrations, credentials, and files in more detail.
2. Compile and save the demonstrated procedure
Select Save when the task is complete. The compiler converts the demonstration into a workflow graph. Wait for its progress to finish and for the editor to report a saved, enabled workflow.
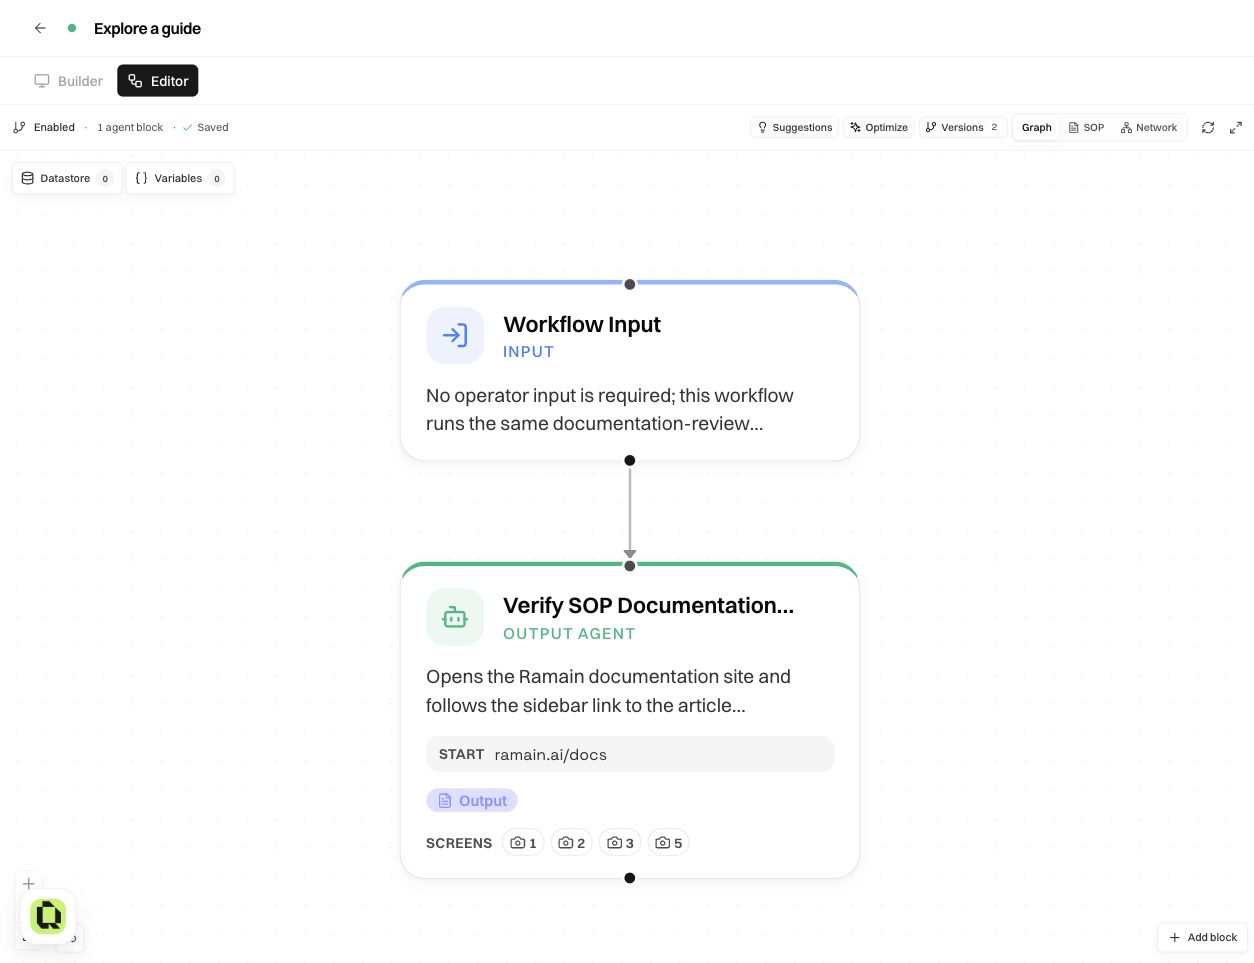
There is no separate Publish action for this workflow lifecycle. The first valid save carrying a graph makes the workflow runnable. Disable pauses new launches without deleting the definition. If incomplete trigger configuration prevents enablement, finish the reported fields and save again.
3. Read the procedure and inspect its screenshots
Choose SOP in the Editor toolbar. Read the task description, numbered instructions, Done when, and What to report back. Make sure they describe what you intended, rather than only the last browser action.
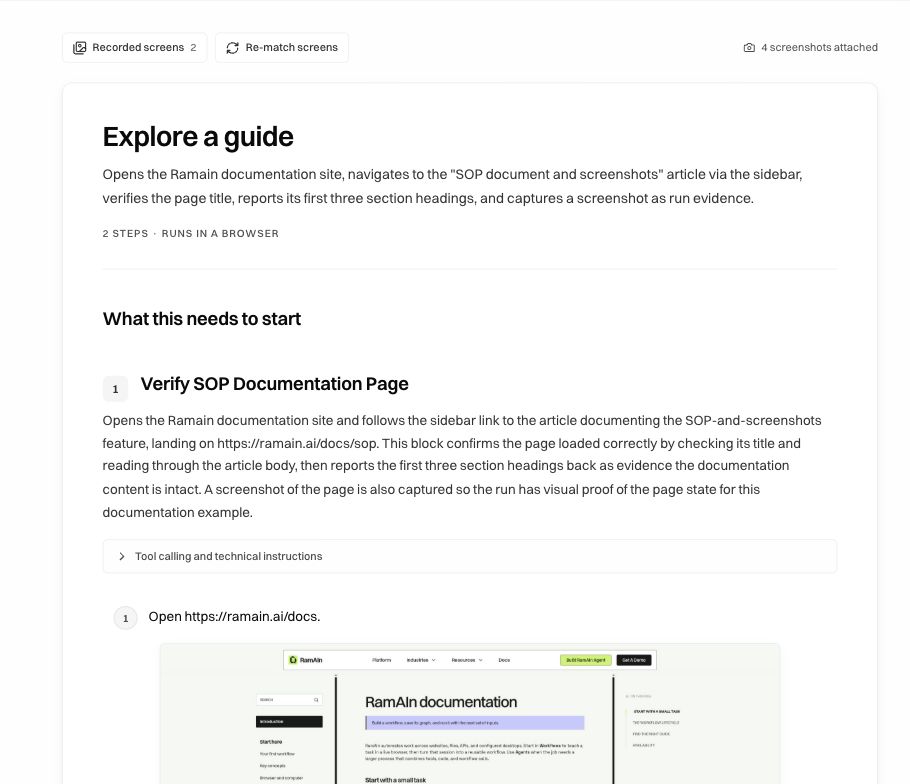
Open Recorded screens to review the captured evidence. Attach a useful screen to the relevant instruction with its camera control or by dragging from the drawer. Confirm that the image explains that particular step. The SOP guide walks through editing, attachment selection, stale evidence, and re-matching.
4. Make the guide name an input
In Editor chat, ask:
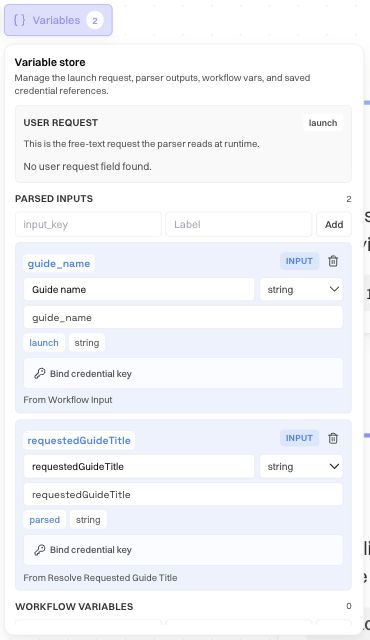
Add a required input named guide_name, labelled Guide name. Use a parser to resolve the exact requested documentation guide title. Update the browser task to open that guide and return its title, URL, and first three headings. If no exact guide matches, ask the operator instead of guessing.
Wait for the edit and save to finish. Open Graph → Variables and inspect the launch field and parser output. Verify that the browser task uses the parsed title rather than its old fixed guide name.
5. Launch the saved workflow
Return to Workflows, find Explore a guide, and select Launch. Enter SOP document and screenshots when asked for Guide name, then choose Continue.
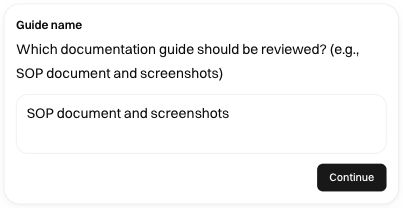
Watch the browser and step progress. Read any question that appears before answering it. A missing-guide question should ask for a decision instead of silently selecting a different page.
6. Verify the result in History
When the run finishes, open its History record. Check the input table, parser result, final output, and available replay. The expected result includes the correct article URL, its page title, and the first three section headings in order.
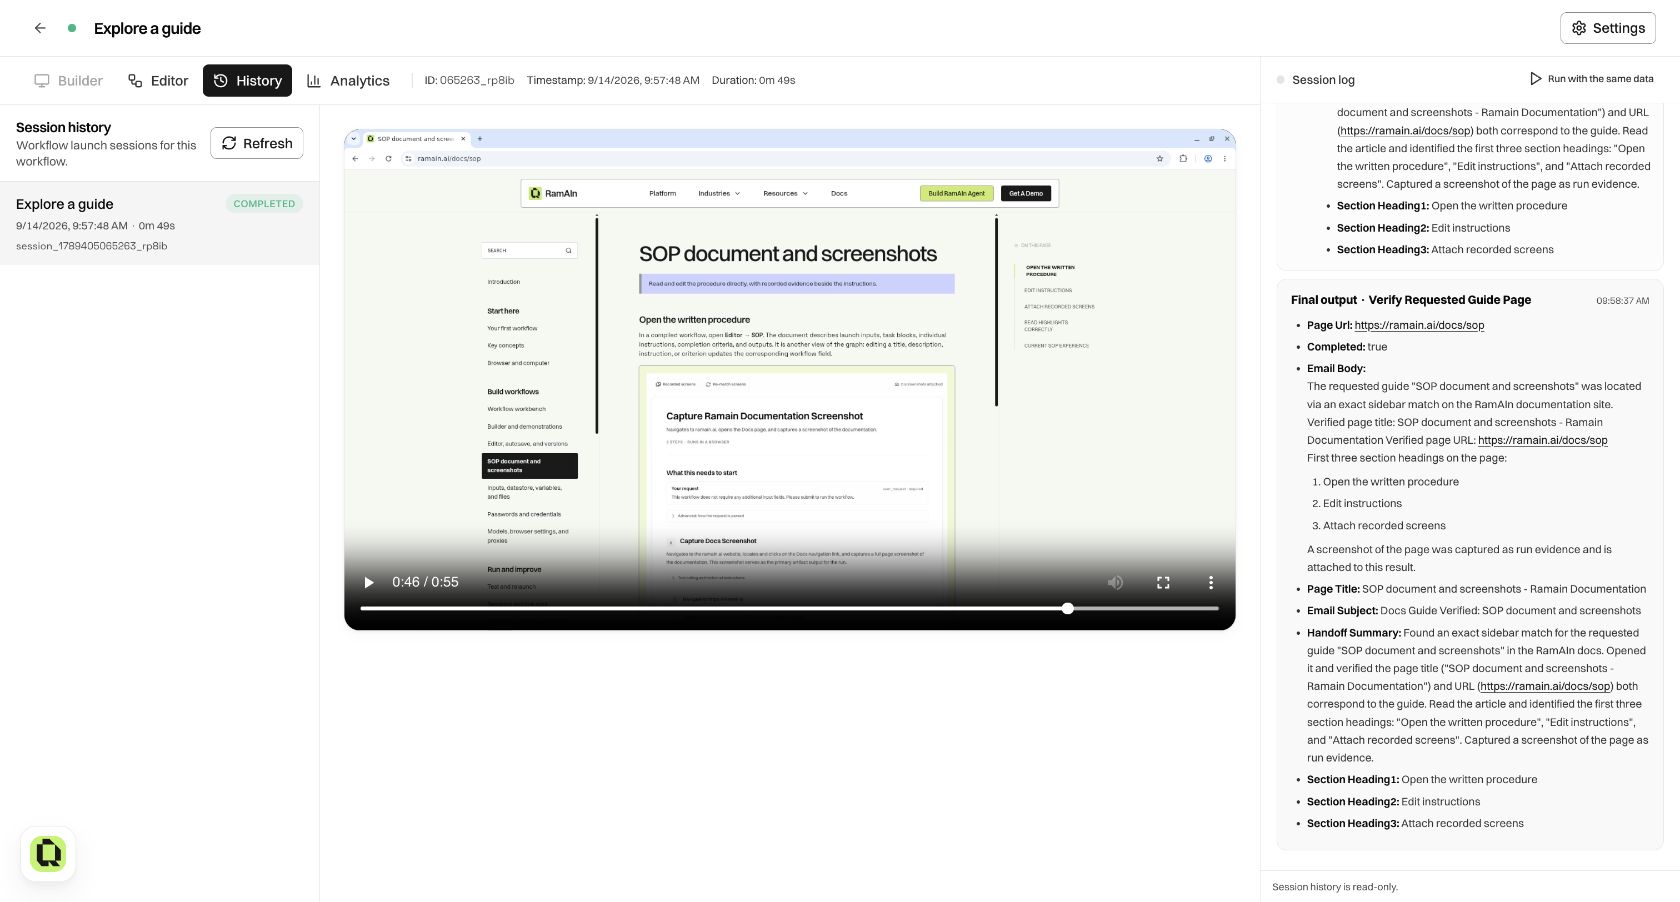
The exact headings in these captures reflect the article at recording time; the guides can change. Check the live article you asked the workflow to review instead of treating the screenshot's old headings as a permanent answer key.
7. Test another input before automating launches
Run the workflow with a different valid guide name. Then test a nonexistent name and verify that the workflow asks for clarification. These two tests show whether the new input and exception behavior work beyond the original demonstration.
Use Run with the same data in History when you want a new run with compatible values recorded by an earlier run. The parser runs again; this is not a playback of old clicks. Once the results are reliable, continue to schedules and email triggers, the API, or Optimize.
Was this page helpful?